


How to Install and Use HandBrake on Fedora 21 / 22
Introduction
The situation is you have a great DVD and you want to view this on your Fedora installation but not by playing the the DVD, but to have it on the drive so you can play it when you are traveling or really do not want to carry the DVD with you. This is assuming this is your personally owned DVD. Well no fear HandBrake is here to the rescue. HandBrake is easy to use, it’s available for Windows, Mac, and Linux, and it’ll convert your file into compatible formats for any device, like an iPad or Android phone.
Prerequisites
Before we can start we will need to add the repository to negativo17 and RPMFusion. First let’s add the negativo17 repository. Change to the /etc/yum.repos.d directory and create the file.
$ sudo vi handbrake.repo
Paste the below contents and save the file.
[fedora-HandBrake]
 name=negativo17 - Open source multiplatform video transcoder
 baseurl=http://negativo17.org/repos/HandBrake/fedora-$releasever/$basearch/
 enabled=1
 skip_if_unavailable=1
 gpgkey=http://negativo17.org/repos/RPM-GPG-KEY-slaanesh
 gpgcheck=1
[fedora-HandBrake-source]
 name=negativo17 - Open source multiplatform video transcoder - Source
 baseurl=http://negativo17.org/repos/HandBrake/fedora-$releasever/SRPMS
 enabled=0
 skip_if_unavailable=1
 gpgkey=http://negativo17.org/repos/RPM-GPG-KEY-slaanesh
 gpgcheck=1
The negativo17 repository requires RPMFusion so if you have it already installed then move on to Step 1 – Installation. If not , read on.
From the terminal type
$ su -c 'yum install --nogpgcheck http://download1.rpmfusion.org/free/fedora/rpmfusion-free-release-$(rpm -E %fedora).noarch.rpm http://download1.rpmfusion.org/nonfree/fedora/rpmfusion-nonfree-release-$(rpm -E %fedora).noarch.rpm'
Step 1 – Installation
For the Hanbrake installation we will need to install the cli and gui packages.
$ sudo yum install HandBrake-gui.x86_64 HandBrake-cli.x86_64
Loaded plugins: langpacks
Resolving Dependencies
--> Running transaction check
---> Package HandBrake-cli.x86_64 0:0.10.2-2.fc21 will be installed
--> Processing Dependency: libdvdcss(x86-64) for package: HandBrake-cli-0.10.2-2.fc21.x86_64
---> Package HandBrake-gui.x86_64 0:0.10.2-2.fc21 will be installed
--> Running transaction check
---> Package libdvdcss.x86_64 0:1.3.0-1.fc21 will be installed
--> Finished Dependency Resolution

Dependencies Resolved

====================================================================================================================================
Package                                         Arch                                     Version                                           Repository                                          Size
====================================================================================================================================
Installing:
HandBrake-cli                           x86_64                                   0.10.2-2.fc21                                     fedora-HandBrake                                   4.2 M
HandBrake-gui                          x86_64                                   0.10.2-2.fc21                                     fedora-HandBrake                                   9.6 M
Installing for dependencies:
libdvdcss                                   x86_64                                   1.3.0-1.fc21                                      fedora-HandBrake                                    60 k

Transaction Summary
====================================================================================================================================
Install  2 Packages (+1 Dependent package)

Total download size: 14 M
Installed size: 31 M
Is this ok [y/d/N]: y
Installation will complete and you have installed HandBrake. Now it is time to have some fun.
Step 2 – Using HandBrake
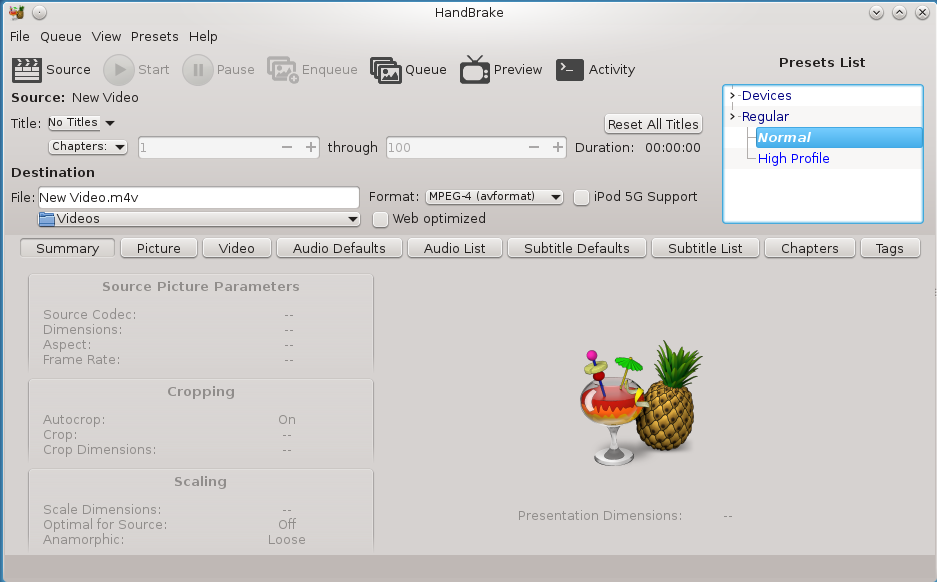
Open the HandBrake GUI and you will be presented with many options and the HandBrake interface.
Insert your DVD and click the Source button in the upper left-hand corner and choose your DVD drive from the list. It will start scanning your DVD, which could take a few minutes.
When it’s done, head to the “Title” drop-down menu in the upper left hand corner of the window. This is where you’ll select which part of the DVD you want to rip. In the case of movies, it’s usually the longest title, so just pick that one. If you’re ripping episodes of a TV show, it’s usually the 22 or 44 minute ones, and you’ll have to rip them each separately.
Click the Browse button on the right side of the window. Navigate to where you want to save your movie file or keep the default location, and type in a file name in the box. Click OK.
Next, head to the bar on the right labeled “Presets”. This is where you’ll choose what format the resulting file will be in. If you just want to watch it on your computer, the “Normal” or “High Profile” preset is fine. If you want to watch it on something like your iPod or iPhone, click on Devices and select your device preset from the list.
Hit the Start button at the top of the window. This will take awhile to run.
When it’s done, you’ll get a popup notification. From there, you can double-click on your movie file to watch it, or sync it to your device of choice.
Conclusion


Leave a Reply