Create VM’s from the Command Line with VirtualBox 4
In an earlier post on creating screenshots using vboxmanage command in VirtualBox. Building on using vboxmanage command I discovered that I could create and modify a VM at the command line. This is an awesome feature if you are always building and deleting VM’s for testing an other purposes.
So in this post I want to cover how to create an modify a VM in VirtualBox from the command line. So let’s get typing.
cd C:\Program Files\Oracle\VirtualBox\
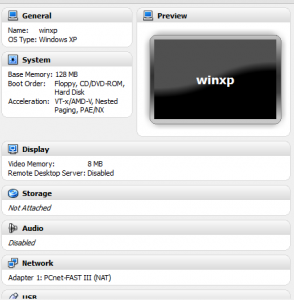
vboxmanage createvm --name winxp --ostype WindowsXP --register
![]()
Get a list of available ostypes use the vboxmanage list ostypes command. The output will scroll off the screen so add | more to the command so it is easy to move down by using the enter key.
VBoxManage list ostypes | more

Now we have a vm but it has no attached storage and has the defaults, so we need to make changes, this is where the createhd, storageattach, storagectl and modifyvm parameters come in to play.
First lets create a disk and attach it to the system.
There are many parameters that you can pass to modifyvm, for greater detail you should refer to the online user manual or execute vboxmanage modifyvm | more and page through the various options. Since we are modifying the VM we just created we will just need to modify parameters.
- network (
--nic<1-N> none|null|nat|bridged|intnet|hostonly|generic) - memory (–memory)
- Video Ram (–vram)
- boot1 (installation)
For our setting we want 512 MB ram, the nic to use NAT, video ram at 128 MB and set first boot to installation DVD. So our syntax is as below.
VBoxManage modifyvm "winxp" --memory 512 --boot1 dvd --nic1 nat --vram 128
Next we need to create a virtual hard disk for the VM and set it to 10 GB.
VBoxManage createhd --filename "winxp.vdi" --size 10000
Now lets add an IDE controller to the VM.
VBoxManage storagectl "winxp" --name "IDE Controller" --add ide --controller PIIX4
Next we will need to assign the vdi (HD) we create earlier to the IDE Controller we added.
VBoxManage storageattach "winxp" --storagectl "IDE Controller" --port 0 --device 0 --type hdd --medium "winxp.vdi"
Attach the ISO file that contains the operating system installation that you want to install later to the virtual machine, so the machine can boot from it.
VBoxManage storageattach "winxp" --storagectl "IDE Controller" --port 0 --device 1 --type dvddrive --medium /path_to/winxp.iso
Finally lets start the VM using the VBoxHeadless command to start the installation. If successful you will see a copyright notice.
VBoxHeadless --startvm "winxp"
Thats all there is to create a VM in VirtualBox from the command line. There are other settings that have to be set through the GUI that cannot be set from the command line. There are also more settings that can be done from the command line. Explore and see what else is possible by using vboxmanage!!


Thanks.
Nice article
You saved me a lot of time.
There’s two typo :
when you create the create a virtual hard disk : –filename “xinxp.vdi” should be –filename “winxp.vdi”
and when you assign the vdi : storageattach “Windows XP” should be storageattach “winxp”
Thanks for the catch on the typos I have made the corrections. Glad the post was able to help you out.