How To Set Parental Controls on Windows 7
I often get calls on how to restrict and monitor access of children on the Internet. Let’s face it, the web is a wonderful and dangerous place and we need to keep our children safe. As geeks we are the ones to assist others. With Windows Vista / 7 there are parental controls that we can use to make the systems much safer to use. This post covers how to set up parental controls on a Windows 7 system.
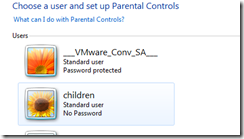
Before starting make sure all the accounts have passwords. To start login with an Administrator level account into the system. and open User Accounts in Control Panel. Click on the Manage another account and select the account to make the changes to. In my case I am using an account called children.
Click on Set up Parental Controls.
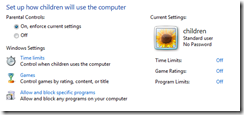
Turn on parental controls for the account by clicking On, enforce current settings. This will now give you options to set for the restrictions. They are:
- Time Limits – Control when they can use the computer
- Games- Control games by rating, content or title
- Allow and block specific programs – Allow and block any programs on the computer
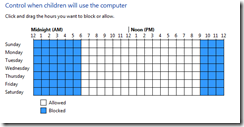
Now we can go in the individual settings. First let’s look at time limits. Open time limits by clicking on the Time Limits link and you will be presented with a grid in which you can select the blocked time by dragging the mouse over the times you would like to restrict access. For example we would like to block 10 PM – 6 AM access on all days of the week. So all we need to do is highlight midnight 12 AM to 6 and 10 PM to 12 and click ok. The result should look like below.
Next we can set the types on games we want them to play. If this is a family system there is probably some adult games yourself or older kids are playing that you want to keep out of their hands. Here’s were to set them. Click on Games link and you will have three selections.
- Can they play games
- Block or allow games by rating and content types.
- Block or allow any game on your computer by name
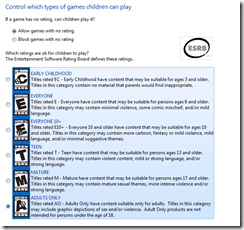
So of course we want to allow them to play games but do we want to block by rating and / or name. Blocking by rating is a good option but you run the risk of if the game doesn’t have a rating will it get through, you can also select an option to not allow non rated games to be played. If this is the method you would like to use then you have several ratings to select from. Click on set game ratings and choose one from the following selections.
- Early Childhood
- Everyone
- Everyone 10+
- Teen
- Mature
- Adults Only
Default is Adults Only, Select the one that fits your child’s age range. Everyone and Everyone 10+ are good selections for younger children.
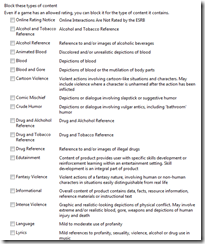
For content there is a long list of options you can select as well and they are too many to mention here but you can review when making the selection.
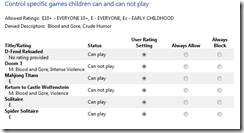
Click ok to save you changes and now we can set individual games. Click on Block or Allow specific games to bring up the dialog.
You will be presented with the programs on your system and have several options to choose from. The default is too User Rating Setting, there is also Always Allow and Always block. make your selections and click ok to save. Click ok once more to save the game settings.
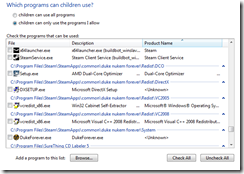
Now we are presented with the last option for parental controls in blocking programs. This is very useful for blocking programs like Skype and other programs your young kids need to not be using. Click on Allow and Block Specific programs link and click on children can only use the programs I allow dialog and Windows will present a list to select, be patient as this may take some time to build the list. Select the programs you want to allow and c lick ok.
Now you have set controls on your children to protect them. One thing missing from Windows Vista parental controls is the web filtering piece. This can be added by installing Windows Live Family Safety which is part of the Windows Live Essentials suite. You can download it from here. Once you have installed Windows Live Essentials 2012 you will now have an option on parental controls under Additional Options where you will now see Windows Live Family Safety. When you click on editing parental controls you will be prompted to enter in Windows Live credentials. This is needed to store your online filtering preferences.
For a good description and examples look at http://windows.microsoft.com/en-US/windows-vista/Protecting-your-kids-with-Family-Safety for how to setup web filtering using Family Saftey.







Leave a Reply