


Using the New VirtualBox 4.3 Video Capture Feature

With the release of VirtualBox 4.3 a new Video capture feature was added that will allows you to save high quality videos of the guest OS easily through the VirtualBox Manager GUI. A wonderful addition to allow creation for training, blog posts and much more!
To start video capture just click on Devices >Video Capture and to stop the capture click on Devices >Video Capture. But before we start the capture process you my want to set a few settings and enable video capture. Make sure your VM is not running and go to Settings > Display >Video Capture. Click on Enable Video Capture and now make a few changes.
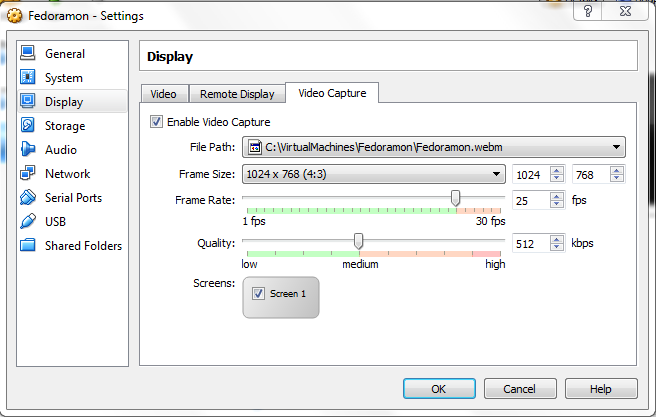
As you can see there are several options available.
- File Path
- Frame Size
- Frame Rate
- Quality
- Screens
For the most part the defaults are ok for me except with the Frame rate which is set at 25 fps and being in the US and using NTSC I prefer to change this to 30 fps and also maybe a good idea to change the Frame Size to match you VM’s window size to make sure you capture everything.
Click OK to save the changes and fire up the VM. Note: This will start the video capture up when you start the VM so, if you do not want to start it go back and un-check Enable Video Capture and it will keep your settings and you can toggle it on and off by using Devices >Video Capture.
The resulting capture files will be save and accessible in the location defined in the settings. So you can upload, convert and publish them however you want! For the best playback results download and install VLC to your system.


That was great, very helpful. Thanks a lot..