


How To Transform 45 RPM’s to MP3 Using Audacity

Introduction
Time for a fun post! You know we have those old 45 RPM’s records laying around that are just not available on iTunes or for download anywhere and we just remember spending endless hours listening to them, okay maybe there are many that may not have those memories, but there are some! With the popularity of vinyl coming back there are many newer options available to play records again and also different ways to transfer them into your system to enjoy once again.
For our transfer we will be using a Numark PT01 USB Turntable and Audacity to capture our vinyl and create and export the MP3 on a Windows 7 system. This process will work pretty much the same on Linux and OSX systems due to the cross platform support of Audacity.
Equipment
As stated above in the introduction we will be using the Numark PT01 USB Turntable and Audacity version 2.1.2 running on a Windows 7 system. The same equipment and software can be used on a Linux and OSX system.

If you have a older turntable you can use one of many USB interfaces that are available like Behringer U-CONTROL UCA202 USB-Audio Interface for around $30.00.
Audacity 2.1.2
Audacity 2.1.2 is free, open source, cross-platform audio software for multi-track recording and editing. It has been around awhile is is a very stable and good piece of software that is updated and improved on a regular basis.
Windows
Download from here. Double-click on download to install.
Download the LAME MP3 Encoder from here. This is needed for MP3 encoding.
OSX
Download from here. Double-click on download to install.
Download the LAME MP3 Encoder from here. This is needed for MP3 encoding.
Linux
Audacity is in almost all the Linux distributions repositories and is very easy to install.
Ubuntu and variants
$ sudo apt-get install audacity
$ sudo apt-get install lame
Fedora 22 +
$ sudo dnf install audacity
$ sudo dnf install lame
Capture Process
First step of the process is to hookup your turntable and identify the interface that the system says is the USB audio interface. Once done you are ready to startup Audacity and set levels.
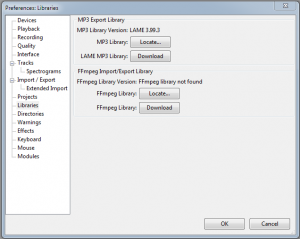
Once we open Audacity we are greeted by the interface. First thing is to check the LAME plugin is installed. Click on Edit > Preferences > Libraries and we should see that Audacity detected the plugin. Click OK to close.
Now we need to set the correct input and the recording levels. Since we are using a USB turntable Windows has detected USB Audio which we find when clicking on the drop down next to the microphone icon in the toolbar.
![]()
Click on Click to Start Monitoring and start the turntable.

Our goal is to have the peak below 0. We can do this by adjusting the level on the microphone level above the microphone input.
![]()
We should close or similar to the picture below.
![]()
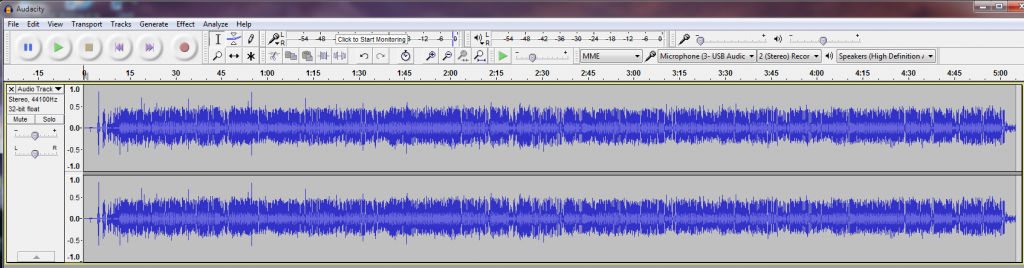
Now we can record our 45 RPM. Click on the record button and start playing the record.

Once the record is done, click on the stop button. You will now see your captured RPM. At this point it is a good idea to save your work. Click File > Save Project As and name your project.
Next it is a good idea to edit the metadata for your project, as well as the metadata is used for your MP3. Click File > Edit Metatdata.
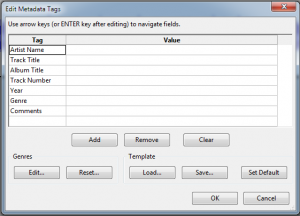
There are several options to add. Select which ones to edit and click OK when you are done.
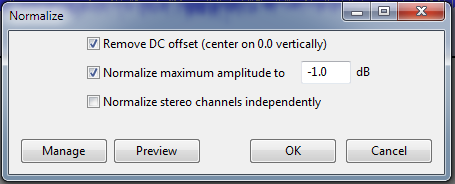
Now we are at a point where we can edit what we have captured, options like normalize, Click Removal and many other options under the Effects menu. For example normalize is something that we would want to do to build our track closer to 0 db and even out the track. To do this we would select the track then click Effect > Normalize and Audacity will show you how much it will change. Click OK to accept, the next dialog is the metadata that you created earlier. Click ok and the export will complete.
Conversion
So now we are ready to export our track to MP3. First select the track and click File > Export Audio. A dialog will show up wanting a file name and the type. Default is wav but, we are wanting MP3. Click the the drop down in Save as type and select MP3.
More options will appear for MP3.
- Bit Rate Mode
- Quality
- Variable Speed
- Channel Mode
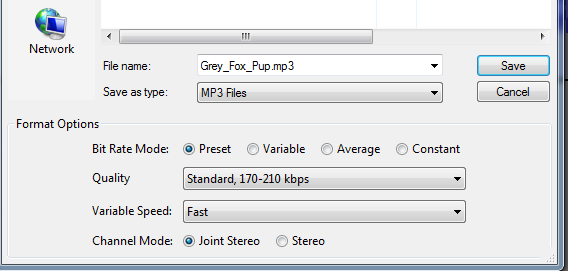
Make your changes and click Save when done.
That is all there is to it to create an MP3 from your 45 RPM! There are many more options for editing and enhancing the track that was captured . Go back in your project and experiment and learn more with the many effects and options available in Audacity.
Check back for future posts on using Audacity and it’s many features.


Leave a Reply