How To Use VirtualDub and Diamond VC500 USB to Capture on Windows 10
How To Use VirtualDub and Diamond VC500 USB to Capture on Windows 10
Introduction
For this post we will look at what it takes to use the Diamond VC500 USB capture device on Windows 10 using VirtualDub 1.10.4 32-bit to capture from a VCR. We will also be using HuffyUV lossless codec as well to get the best quality we can with the capture.
Setup
For this capture we will be using the following setup, The time based corrector is not required but is part of my chain.
- JVC DR-MV78 VCR
- AVTool AVT-8710 TBC (Time Base Corrector)
- Diamond VC500 USB Video and Audio Capture
- VirtualDub 1.10.4 (32-bit)
- HuffyUV 2.1.1 (32 & 64-bit)
- Windows 10 Professional 21H2
So there are several pieces will will need to download and install as well as purchase if you do not have them.
Diamond VC500 driver Install
First piece of the puzzle os to download and install the Diamond VC500 Windows drivers. Download the drivers from https://www.dmmdownload.com/downloads/CURRENT/PVR/VC500W10PD_Complete_install.zip. Once downloaded extract the files and Open the Driver folder, open the x64 folder and run the Setup64.exe file to install the drivers for your VC500.
HuffyUV Installation
Next we will need to install HuffyUV 32/64 bit encoders. I have covered this in a previous post Installing HuffyUV on Windows 10.
VirtualDub 1.10.4 Download
If you have VirtualDub 1.10.4 or a previous version you are ready to go but if not you can get it here. VirtualDub does not have an installer so you will want to extract the zip file to a location of choice. For this example I have extracted mine to C:\Utils\VirtualDub folder.
Hardware Setup
We are now ready to connect all the devices and set the video and audio settings in VirtualDub and start capturing.
- Hook the VCR audio and video outs to the VC500, Note the S-Video out on the VCR will get you the best results.
- Power on the VCR with your tape in it but not running.
- Plug the VC500 USB 2 interface into your Computer.
Now we can start VirtualDub interface. Double click on VirtualDub.exe (C:\Utils\VirtualDub\VirtualDub.exe) to start the program.
VirtualDub Settings
Now we are ready to setup VirtualDub settings.
Click File > Capture AVI. This will change you to the capture interface.
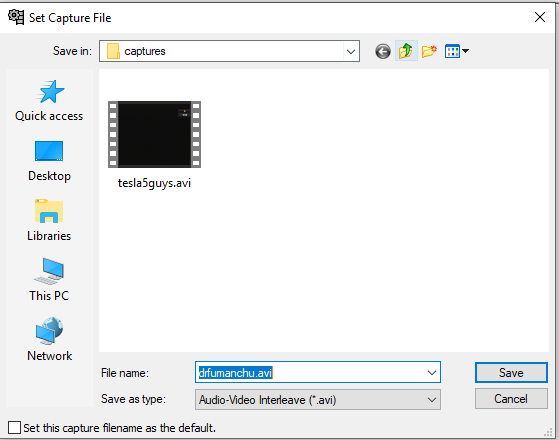
Next set the capture file name.
Click Set Capture File….
Set a location and name for the intended capture file. Make this a drive other than your C Drive if possible.
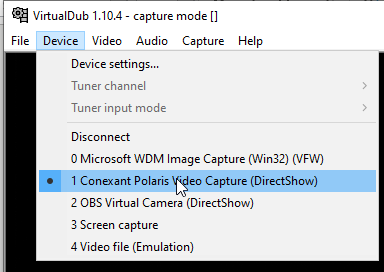
Set Device
Click Device > Conextant Polaris Video Capture (DirectShow)
The VC500 will show as a Conextant device. In this case Conextant Polaris Video Capture (DirectShow).
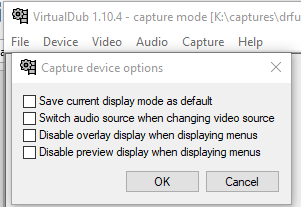
Click Device > Device settings
Uncheck all the boxes if checked.
Now we need to set a few Video settings.
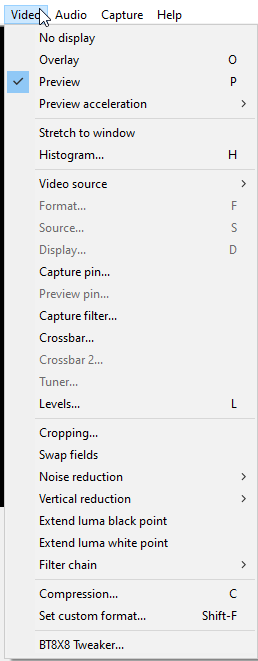
Set the Video to Preview, Click Video > Preview. I use Preview mode and let VirtualDub control display.
Click Video > Preview acceleration > “off”.
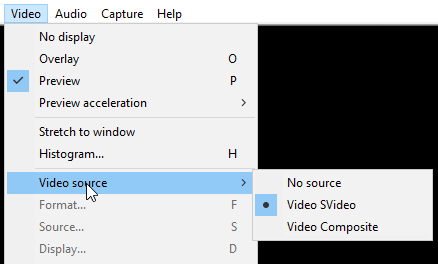
Click Video > Video Source and set to Video Svideo
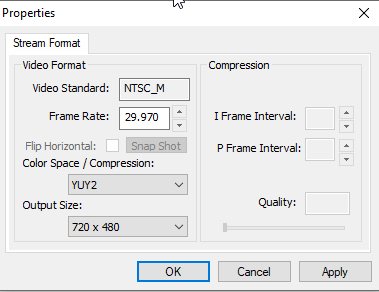
Click > Video > Capture pin
The “Video standard” is set in “Capture filters” and can’t be changed here.
Frame rate corresponds to default of the standard signal format set in “Capture Filters”, below. You can change it if you want (at your own risk), or in “Capture” -> “Capture settings…”.
Color space/compression. YUY2 is usually for VHS or other analog tape, but some cards only allow YUVY 4:2:2 color matrix capture (it’s the same as YUY2 but has a different order for the chroma pixels).
“Output size” can be changed here but I do it in “Custom format” and keep it all in one place. The setting in Custom format.
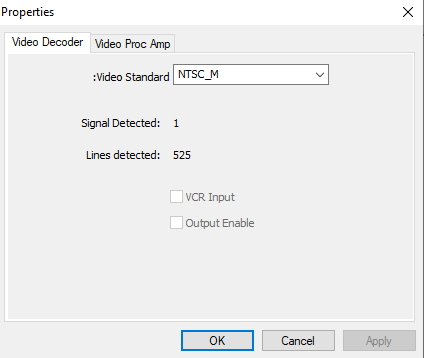
Click Video > Capture filters
This sets and displays incoming video stream properties.
“Video standard” of the input source.
The input panel displays a list of available incoming a/v formats (*NTSCV, PAL, etc.). The usual default is NTSC_M. Some common input stream formats:
- NTSC_M USA, Canada, U.S. territories, Jamaica, Phillippines, Panama, most of
- South America (not Brazil), South Korea.
- NTSC_M_J or “NTSC_J” (Japan)
- PAL B/G (most of Western Europe, Australia, New Zealand)
- PAL_I (the UK, Ireland, Hong Kong, South Africa, Macau)
- PAL D/K (most of Central and Eastern Europe)
- PAL D (mainland China)
- PAL-M (Brazil)
- PAL-N (Argentina, Paraguay, Uruguay)
- PAL-L (same as B/G)
- “PAL 60” hybrid, usually for NTSC_M in PAL systems.
- Most flavors of SECAM (France)
Lines detected is not changeable.
Output enable is disabled by default.
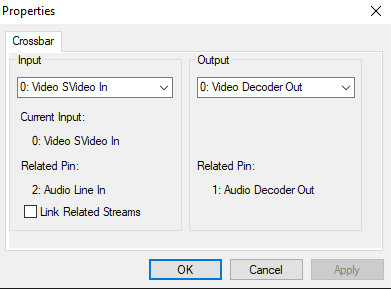
Click Video > Crossbar
Values here are taken from the installed capture driver’s input connections, but can be changed if other options are available. I never get involved with it. Crossbar drivers handle routing of inputs/out-decoders in Windows. VDub has no help on this, so be sure you know what’s up when making changes.
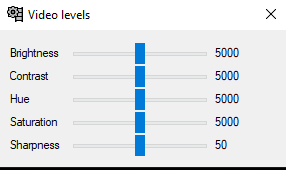
Click Video > Levels
These are proc amp settings usually linked to the capture device’s proc amp controls. Different capture cards have different dialog and defaults. Some cards don’t provide a link that VDub can use here. Above, typical proc amp for VC500.
“Brightness” adjusts black levels, “Contrast” adjusts brights. Use these two controls in conjunction with the capture Histogram and Cropping features to set valid input levels for 16-235 video. The controls interact somewhat, but with some fiddling you can adjust the tonal range for acceptable input levels. Levels fluctuate during play, so at best you should set levels for worst-case scenarios and tweak later.
There are usually sharpness and saturation controls. If your input is badly over- or under-saturated, you can adjust here. Caution: saturation affects the saturation of all colors, not just one. Over-saturation results in color bleed and overload (blooming or glowing colors). “Sharpness: might be able to mitigate sharpening halos, don’t sharpen VHS: all you’ll do is sharpen noise.
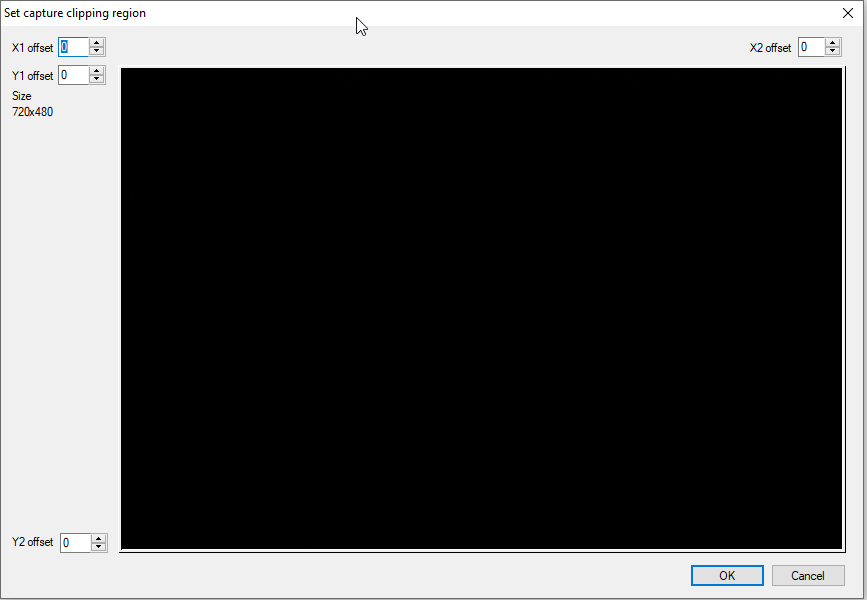
Click Video > Cropping
Cropping can be used to mask off areas that affect the levels histogram, such as black or white borders and head-switching noise. You can crop left, right, top, and bottom. TURN THIS OFF BEFORE STARTING CAPTURE or you’ll have an unwanted/unacceptable frame size or an error message. Cropping can be turned off ONLY be resetting the crop parameters to all-Zero’s. Simply clicking the “Cropping…” menu item won’t turn it off.
Noise reduction > Don’t use this.
Vertical reduction > Don’t use this.
Extend luma black point > Don’t use this.
Extend luma white point > Don’t use this.
Filter chain > > Don’t use this.
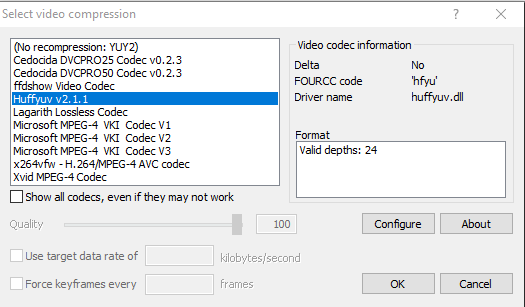
Click Video > Compression
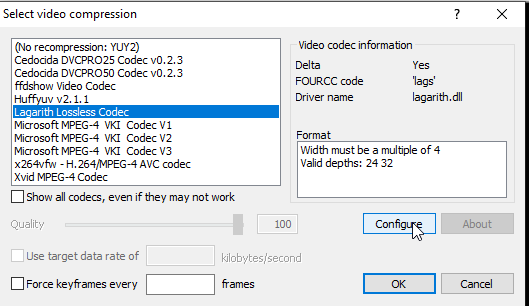
Sets compression for the capture file. Installed Compression codecs that Virtualdub can use are shown here. We will be using HuffyUV for this example but Lagarith
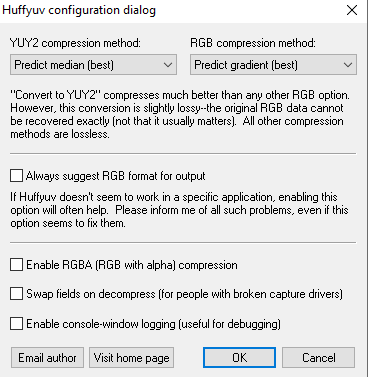
Click the huffyuv “Configure” button n the lower right area to check you huffyuv setup.
Below, are my settings for HuffyUV lossless compression. The colorspace of the capture file (YUY2) has been set elsewhere. HuffyUV detects the output colorspace and compresses accordingly.
HuffyUV accepts only YUY2(UYVY) or RGB.
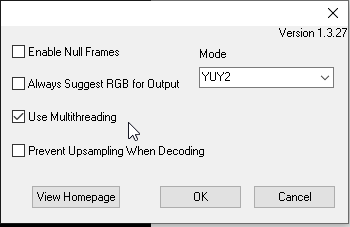
Below, the setup I use for Lagarith lossless compression:
To check Lagarith compression settings (I strongly urge you to do so, since other processing apps using Lagarith can change its configuration), click the Configure button at lower right.
Below, my setup for Lagarith/YUY2:
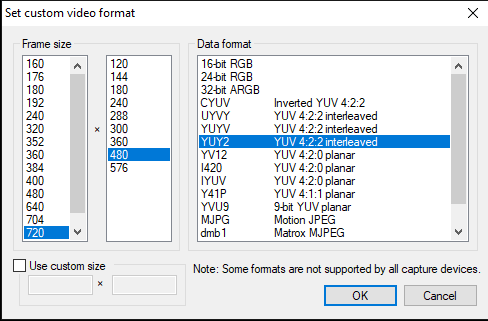
Set custom format.
Click Video > Custom Format.
This dialog sets frame size and compression method.
Audio Settings
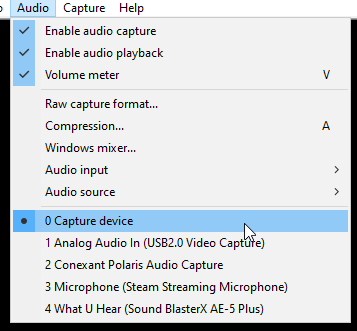
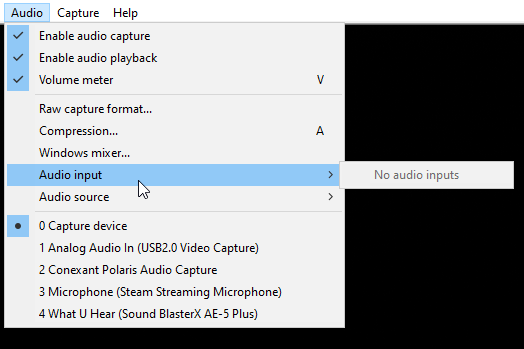
Audio (top menu)
At the bottom of the Audio menu I’ve selected the audio source. With the VC500 you just need to select Capture device. USB devices, the capture device would appear in this list. Some USB cards with their integrated audio processing require you to choose “0 Capture device” in this list.
Click the following options under Audio.
- Enable audio capture
- Enable audio playback
Enable audio playback during capture at your own risk. It can result in dropped frames and/or loss of audio sync. Try it and see if you have any issues. If you experience dropped frames I would disable it (un-check)
- Volume Meter
Enables view of audio volume level at the bottom of the capture window. Personally I enable it but it is optional and if you have not enabled audio playback it will give you a visual of the audio while capturing.
Raw capture format
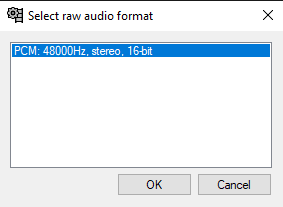
Click Audio > Raw capture format
Use uncompressed PCM: 48000Hz, stereo, 16-bit. If you need a different bitrate or whatever you can change audio properties later, but capturing compressed audio codecs for lossless video ain’t a good idea. Compressed audio formats use more CPU during capture.
Click Audio > Compression
Set to “<no compression (PCM)>” during capture.
Click Audio > Windows mixer
A Link to the audio card’s control panel dialog. You can set input volume here if you’re getting pure screech and boom for audio input. The bottom of the audio menu lists available audio input sources. Choose the correct device before fiddling with the Input and Source entries.
Click Audio > Audio input
Most USB devices have their own integrated audio input and audio timing setup, so you might not see an entry here, as is the case with VC500.
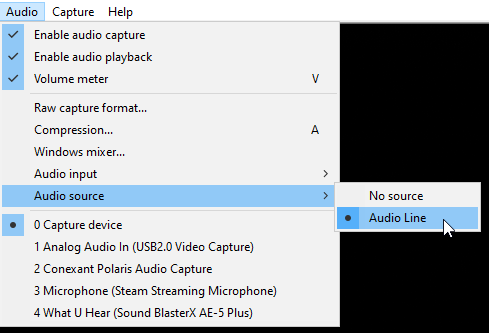
Click Audio > Audio source
Set this to Audio Line if not set automatically for you.
Capture Settings
Click Capture > Capture Video F5,F6
I use F6 to to start capture. This is what Vdub sets as default.
Click Capture > Test Video capture
Used to test your capture. No settings to set.
Stop Capture Esc
Press the “Esc” key to stop capture.
Click Capture > Settings
Set the frame rate for capture here if it isn’t already set. The default is 15.0000.
Click Capture > Preferences
Side panel information items
Set the items you want displayed in the capture window’s right-hand information panel by clicking on the item. I use the defaults.
Click Capture > Hot Keys
You can change the app’s hot keys if you want. Defaults work good for most users.
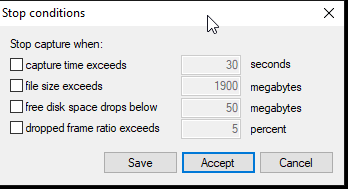
Click Capture > Stop conditions
I’ve set no limits here. When a limit is reached, capture stops. In this menu, Accept uses the settings for the current session. Save keeps the settings until you change them yourself.
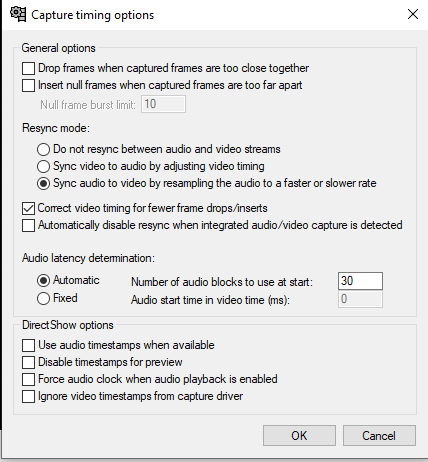
Click Capture > Timing
These options set up the way VirtualDub matches video to audio during a capture. Video frames can stream in from the video capture with irregular timestamps due to timing inaccuracies and interference with system background tasks. Bad timing can also come from the source video or the player. During capture these issues have to be resolved for something more consistent and correct.
The rest of the settings in VirtualDub I am just using the defaults. At this point we are ready to start the capture.
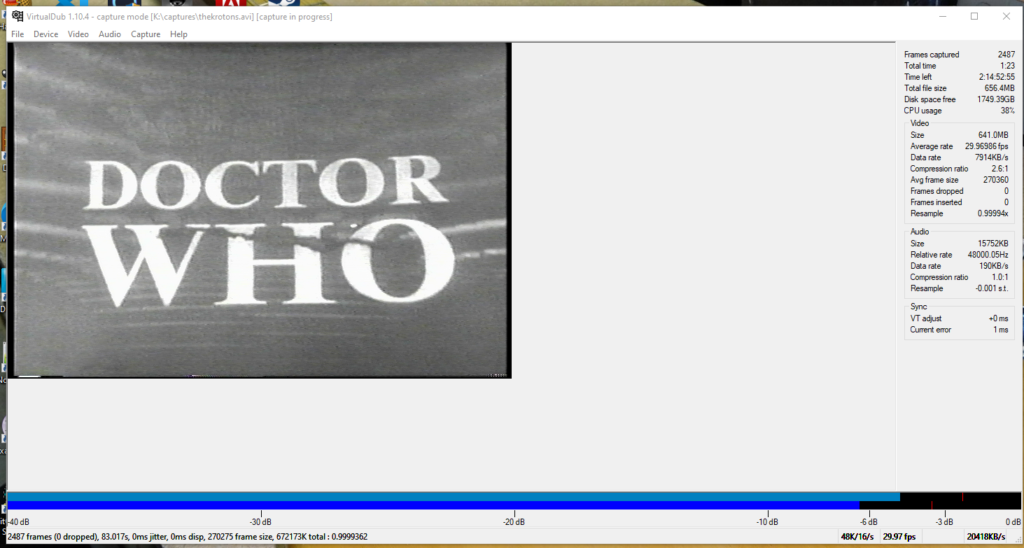
Click Capture > Capture video or press F6
Press ESC to stop the capture.








It’s 2023 and this still helped me so much! Thank you!