How to Setup iSCSI on Windows 2008 R2
Here is one of those topics you do not see much, sure there are basics on setting up the Microsoft iSCSI Initiator but what about the details in adding the whole thing, well here it it is!.
Overview
In this post we will be configuring a NIC just for accessing the storage, configuring the iSCSI Initiator, then adding the storage to the server.
Configure the iSCSI NICS on Server
Before we can configure the iSCSI Initiator we need to make sure that there are NIC’s configured on the same vlan as the iSCSI target. Preferred is to have two NIC’s for fault tolerance. The setup is the same as with any other NIC’s on the server with the exception that you do not want this to register in DNS.
Rename the Adapters for easy identification at a later date. For this instance we have named them iSCSI LAN1 and iSCSI LAN2. This is an optional step, your call.
Start iSCSI Initiator Service
First we need to enable and start the Microsoft iSCSI service. Here are several ways to access Microsoft iSCSI service.
- Click Start, click Control Panel, click Classic View, and then click iSCSI Initiator.
- Click Start, click Administrative Tools, and then click iSCSI Initiator.
- Click Start, in Start Search, type iSCSI, and then in Programs, click iSCSI Initiator.
- Click Start, click Control Panel, in the search field, type iSCSI, and then in Administrative Tools, click iSCSI Initiator.
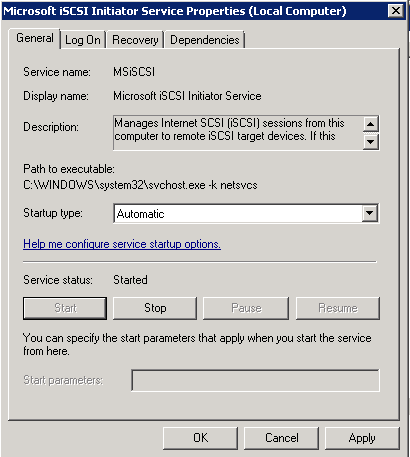
Start the service and then change Startup Type from Manual to Automatic.
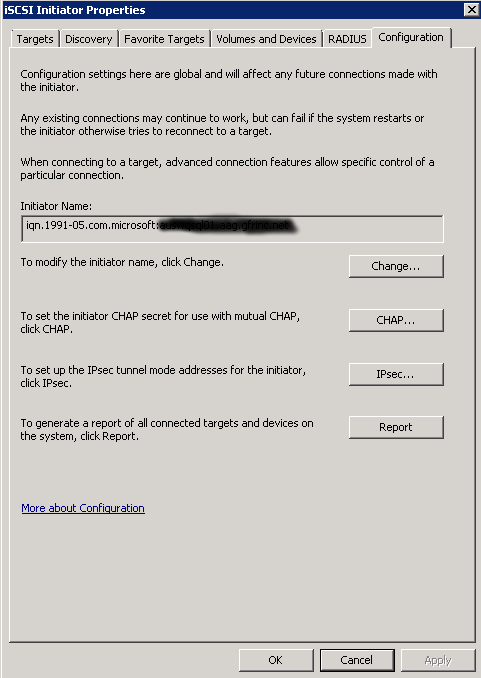
While we are there we need to get the IQN.
Every iSCSI initiator and target must have a worldwide unique name. Typically, this is an iSCSI qualified name (IQN). A single IQN applies to all iSCSI HBAs on the server, including Microsoft iSCSI Initiator. You should not configure an iSCSI HBA to have a different IQN than the IQN that is used by other iSCSI HBAs and Microsoft iSCSI Initiator; they must all share the same IQN name.
Microsoft iSCSI Initiator automatically chooses an IQN that is based on the computer name and the Domain Name System (DNS). If the names of the computer or DNS are changed, the IQN also changes. However, an administrator can specifically configure the IQN to be a fixed value instead of the IQN that is generated. If the administrator specifies a fixed IQN name, that name must be maintained as worldwide unique.
Click on the Configuration tab and copy the IQN number generated by Microsoft. At this point we are ready to configure the storage. Your storage administrator will need to have the IQN information for configuration of the host on the iSCSI server. Once completed we are ready to attach the storage to the server.
Add Storage
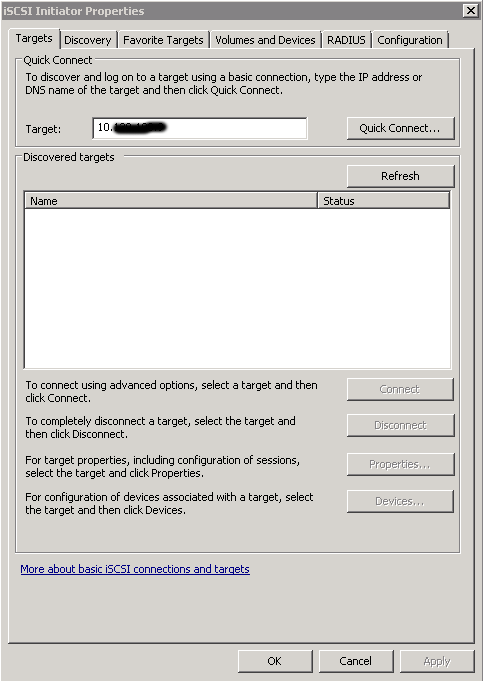
Open Control Panel and click on iSCSI Initiator. Now we are going to add the target initiators, the iSCSI storage server. Type in ip address of the target initiator and click Quick Connect.
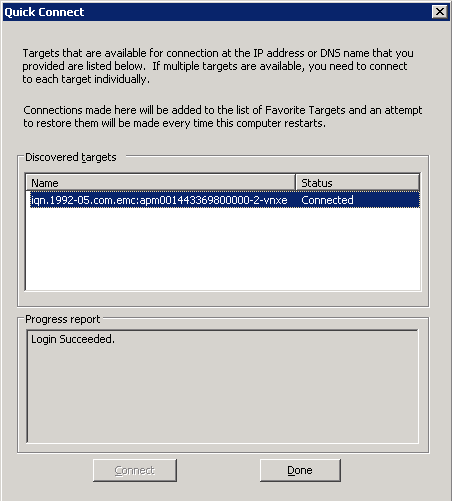
The Quick Connect screen will appear and if a successful connection occurs you will now see the iqn for the iSCSI server.
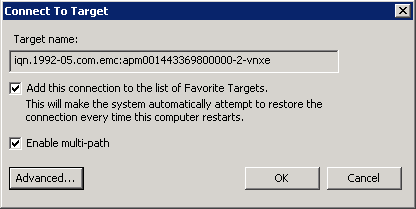
Click Done. While in the same screen, click on Connect. Check Enable multi-path box, then click Advanced. We need to set a few settings for the first connection.
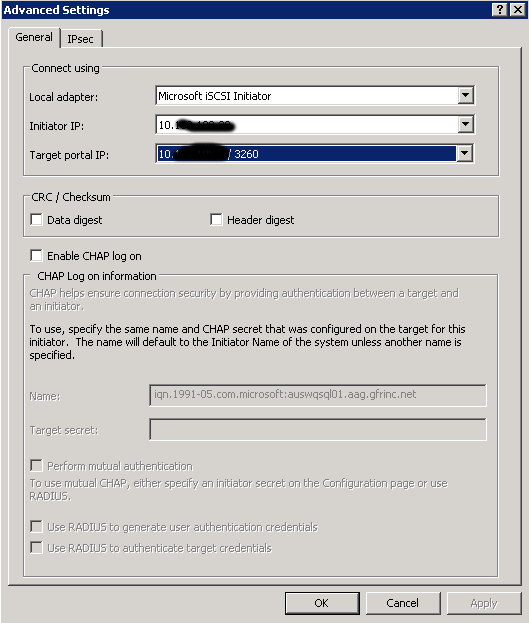
Fix the advanced settings for the target.
Select the following.
Local Adaptor: Microsoft iSCSI Initiator
Initiator IP: <your servers storage NIC>
Target proxy IP: <select the target ip of the iSCSI server>
Click OK to save the changes then OK again to save the check box changes and this will put us back to the iSCSI settings.
From the example above we have added the first IP address for SPA. So now we need to add the second SPA address. While still on the targets tab and the only IQN is highlighted click the Connect button. This will bring up the same advanced / Connect to target dialog as before. Click the Enable multi-path box and click Advanced. The settings in advanced are now going to point to the other NIC for the iSCSI target.
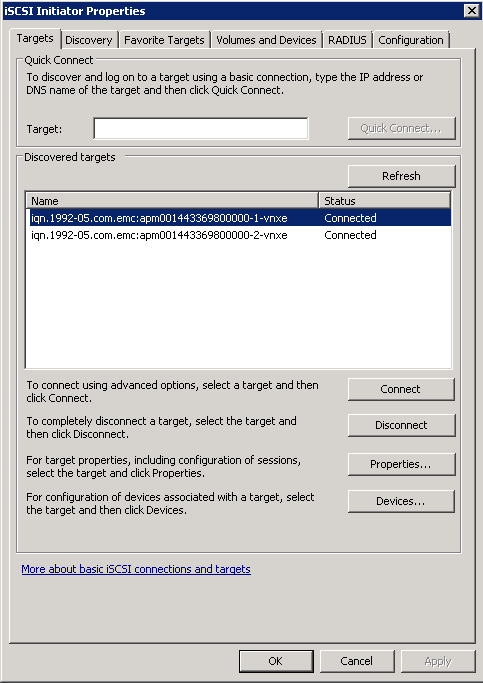
Click OK, then OK and once again we will be back at the targets. Now we need to add iSCSI target SPB to the targets. Use the same process as when iSCSI SPA target were added and the second NIC for the Initiator IP. When you are done your targets should look like this.
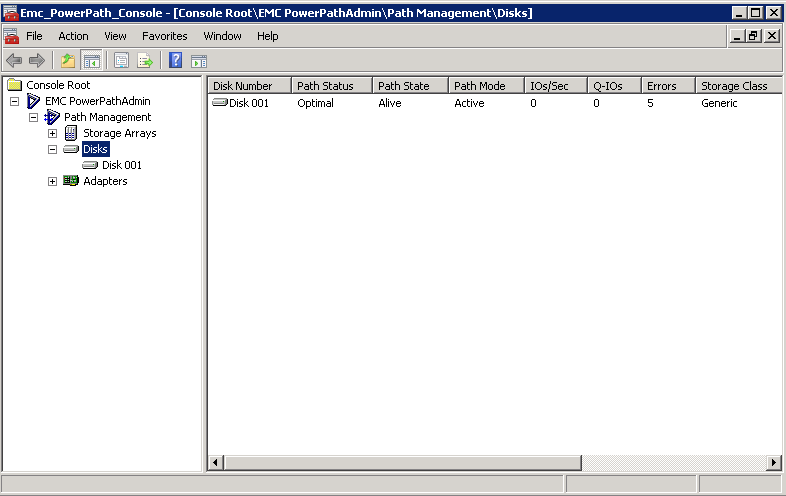
Now that we have added the storage and the iSCSI is configured on the host we will be able to format and see the storage on the server. If you are using EMC PowerPath. We should see the disk showing.
Our final step is to bring the disk online, initialize it and format it. Open Server Manager and expand Storage and click on Disk Management. The service will re-scan the disk and find the new storage. Right click on the new disk and click bring online. Right click again and select Initialize Disk. A box will popup, select GPT and click OK.
We are now ready to format the disk. Right click on the un-formatted disk and select New Simple Volume. Select a drive letter and click next. This next part is crucial. If this is for Microsoft Exchange or Microsoft SQL Server, the allocation unit size must be set to 64k for best performance. Otherwise, leave it at default. Fill in the volume label and click OK.
That is all there is to it, you have successfully added iSCSI storage to a Windows 2008 R2 server.




Three years and no other comments, maybe I am just uninformed.
Thanks for the article!!! I have been struggling through HP documentation for days and this is the first “how to” that was useful. I’m installing my first SAN and it has been a bit of a challenge.
You are not uninformed, iSCSI is not easy to get working especially on Windows. What is the issue you are having? I do not have access to the systems I used to write the post but I can see what I can do.
My iSCSI targets disconnect randomly every 4-5 days, major pain to get them back, once I do I can count on them dropping in a few days.
Really frustrating.
I have set up “Round-Robin” “Adaptive Load Balancing” etc…. LACP everything… Now I’m back to the basics, single NIC on both server and NAS, really makes no difference.
I only have 25 network users? don’t understand and Netgear is useless with helping. Any thoughts would be appreciated.