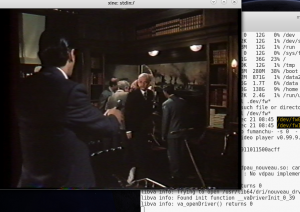
Capturing Video using Firewire and dvgrab on Fedora 25
Introduction
In this post we will explore how to capture video with a firewire card. We will use dvgrab along with a GrassValley ADVC 110 firewire interface. To start we will need to make a few system changes and user id changes to make this happen on Fedora 25 or any other version of Fedora.
Getting Details
We can see what Fedora detected in several ways. One way is to use dmesg command and look for firewire_core. On this system example we see a two port firewire card.
[    9.592112] firewire_core 0000:04:00.0: created device fw0: GUID 0011223333666688, S400
 [    9.593766] firewire_core 0000:04:00.0: created device fw1: GUID 002011011500acff, S400
The output shows us the device Fedora has chosen and GUID. We can also find the information in /var/log/messages and searching for firewire. The GUID information is useful to take note as if you have mutiple firewire devices connected you will need to use the GUID to tell dvgrab which interface to use.
Nov 23 14:18:02 fed25dv kernel: firewire_core 0000:04:00.0: created device fw0: GUID 0011223333666688, S400
Nov 23 14:18:02 fed25dv kernel: firewire_core 0000:04:00.0: created device fw1: GUID 002011011500acff, S400
Now that we know a bit about our device we can find more information. Fedora creates firewire devices under /dev using fw for the name prefix. Going to /dev we can see the devices.
$ ls -al fw*
crw-rw-rw- 1 root root 241, 0 Nov 23 14:18 fw0
crw-rw-rw-+ 1 root video 241, 1 Nov 23 14:18 fw1
By default the owner and group are root until the system sees a device is plugged in and powered on. Looking at the output you will notice video as the group owner of fw1.
Running the command lspci -v shows us more detail on the card.
04:00.0 FireWire (IEEE 1394): VIA Technologies, Inc. VT6306/7/8 [Fire II(M)] IEEE 1394 OHCI Controller (rev 80) (prog-if 10 [OHCI])
        Subsystem: VIA Technologies, Inc. VT6306/7/8 [Fire II(M)] IEEE 1394 OHCI Controller
        Flags: bus master, medium devsel, latency 64, IRQ 16
        Memory at f76ff000 (32-bit, non-prefetchable) [size=2K]
        I/O ports at dc80 [size=128]
        Capabilities: <access denied>
        Kernel driver in use: firewire_ohci
        Kernel modules: firewire_ohci

And if not enough information we can use udevadm.

$ udevadm info --attribute-walk --name=/dev/fw0
Getting Access
By default Fedora sets the video group as the owner of the firewire devices. To be able to capture using the device you will need to add your user id to the video group. To add your userid to the group type:
$ sudo usermod -a -G video <your id>
One last change is the permissions on the firewire devices. They need to be set to 666 for use. This will change each time the system is rebooted and will have to be reset with each use.
$ sudo chmod 666 /dev/fw1
We can create a udev rule that will take care of this each time automatically.
$ sudo vi /etc/udev/rules.d/40-udev.rules
Put in and save the following.
SUBSYSTEM==”firewire”, GROUP=”video”, MODE=”0666″
Capturing Using dvgrab
We are now ready to capture using dvgrab. Dvgrab is a command line capture utility which can capture from many different devices. In this case we will be using firewire so we will not have to pass many variables to capture. The drawback to dvgrab is you cannot see what you are capturing.
By default dvgrab will save in 1024 MB chunks which create a lot of files that you will have to piece together. If you have the space we recommend one big file to capture. You can set this using -s 0 to set the file to unlimited. By default dvgrab will save the files as dvgrab-xxx.xx where the first X’s are the number and the prefix is the filetype which are dv (raw), avi (dv1, dv2), dif, qt, mov, jpeg, jpg, mpg and hdv.
For instance say you want to save the files as myvideo- and one big capture file we would use
$ dvgrab myvideo- -s 0
Found AV/C device with GUID 0x002011011500acff
Waiting for DV...
Capture Started
If we just wanted to save the video as is with dvgrab’s defaults we would just execute dvgrab.
$dvgrab
Found AV/C device with GUID 0x002011011500acff
Waiting for DV..
Capture Started
"dvgrab-001.dv": 999.98 MiB 8738 frames timecode 00:04:51.19 date 2067.02.15 22:26:25
"dvgrab-002.dv": 999.98 MiB 8738 frames timecode 00:09:43.07 date 2067.02.15 22:26:25
Each time the 1024 MiB is reached dvgrab will give a status as shown above.
Change into the directory that you will be saving the captured video to and run the dvgrab command of your choice. Once the video is done you can press Ctrl+C to stop the capture and you are done.
There are many other options available for dvgrab, by typing dvgrab –help you can see other possibilities.
$ dvgrab –help
One other option is to capture and also view your progress by piping to ffplay or xine as an option.
$ dvgrab myvideo- -s 0 – | xine stdin:/


I just decided to import DV from my old cam recorder. Thanks for your post, it’ll help me to begin 🙂