


Calibrating Profiling a Monitor in Linux Using a Datacolor Spyder 4
What is Calibration
The display behavior is measured and adjusted to meet user-definable target characteristics, like brightness, gamma and white point. This step is generally referred to as calibration. Calibration is done by adjusting the monitor controls, and the output of the graphics card (via calibration curves, also sometimes called video LUT curves to get as close as possible to the chosen target.
To meet the user-defined target characteristics, it is generally advisable to get as far as possible by using the monitor controls, and only thereafter by manipulating the output of the video card via calibration curves, which are loaded into the video card gamma table, to get the best results.
Why Should You Calibrate?
So then why should you calibrate? Well if you want to be a perfectionist its a lot easier to do when things are accurate. That’s really it. Especially if you’re working on high end print campaigns for companies that have a very specific brand color. The other usage is mostly in cinema where you want to ensure the film is going to look identical in theaters as it does on the standard TV. That means color grading it for both.
You can absolutely get by as a photographer or a designer without ever calibrating a monitor. Do you have to do it? No. Does it help? It can. If you’re going to spend money on something do a high end display first though otherwise you’re just wasting your money trying to calibrate a low end display, or you can use a third party application to create and manage the profiles and that is where DisplayCAL comes in.
Installation
First download DisplayCAL from https://displaycal.net/#download.
For Fedora get the correct RPM version based on the release you are running.
Then install with dnf (replace filename with your version):
$ sudo dnf install DisplayCAL-3.3.5.0-1.1.x86_64.rpm
You should now be able to run displaycal from the shell, or you can click on the shortcut created in your GUI’s menu.
You can now plugin plugin your Spyder4 to an available USB port.
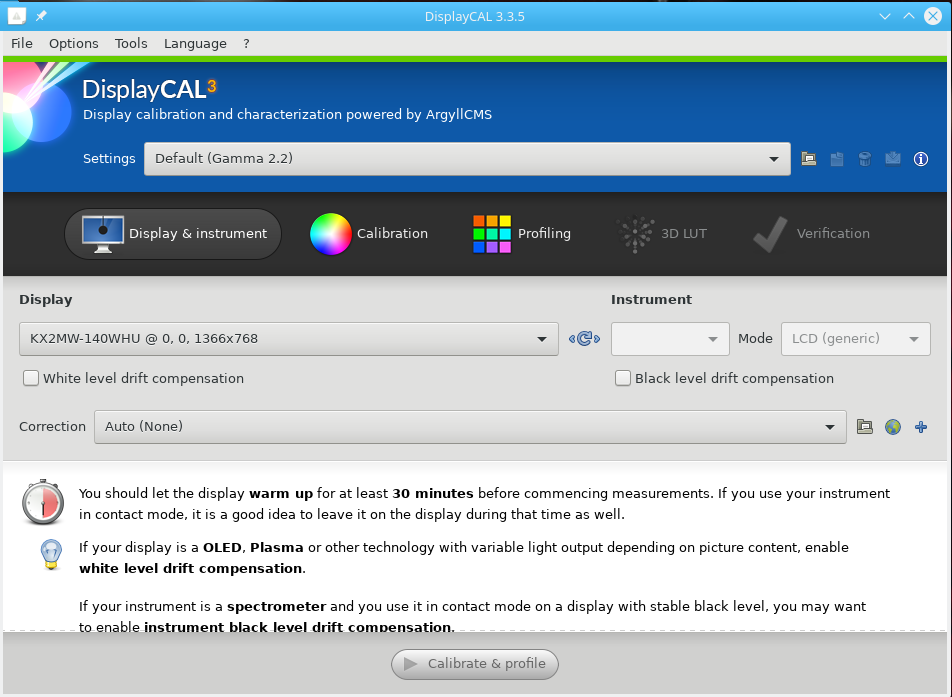
Wait a few seconds then click the refresh button in between the “Display device” and “Instrument” drop-downs. It should then show “Sypder4” in the Instrument drop-down. A popup will appear prompting for software, if you have it insert it, if not no problem, the software will be downloaded.
Next change your Display device to the one you would like to calibrate. This really only applies if you have more than one monitor connected. Then click the Mode drop-down to select the type of display you have.
Click on the Calibrate and profile button to start the process.

So the Calibration process is mainly adjusting your monitor settings, Colors, Tone, Brightness, etc to get as close as you can to accurate. Then Profiling is adjusting via software to get even closer yet.
Next we need to put the Spyder on the the monitor somewhere in the middle.
Finally click the “Start measurement” button start the processes.
It will then flash a few colors. The idea is to now adjust your Red, Green, and Blue colors to try and get the bars as close to the middle arrows as possible. Then adjust your contrast to get the bottom bar in the middle. It will now generate some Patches and display them in the middle. Just let it run. This may take a while to complete. It will go through several iterations of patches.
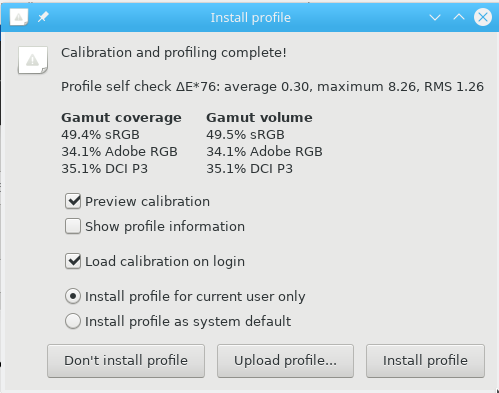
When it’s finally complete select “Install profile”. This will install it for your user account.
If you want to compare it with the original then add one of the “Default:” profiles. Then you can click between the two to compare.
Repeat the above steps for a second monitor if you have one.


Leave a Reply