


How To Disable IPV6 on Windows 10 with PowerShell

How To Disable IPV6 on Windows 10 with PowerShell
Introduction
In today’s post we will look into how to disable IPV6 using PowerShell on Windows 10. You ask why would you want to disable IPV6? There could be several reasons like not being used on the network, causing network binding issues or causes intermittent network disconnects (VPN) and other reasons. SO let’s move along and see just how to do this with PowerShell.
Disable IPV6
We are ready to begin. Open PowerShell with administrator privileges, now we need to get our available interfaces and see whats enabled. For this example we’ll be using a laptop connected via Wi-Fi.
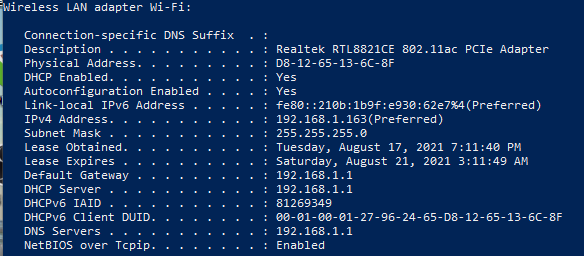
Check current IP address for IPV6 by running the command ipconfig /all
Use Get-NetAdapter cmdlet to get the required information.

From the output we see Wi-Fi is the name of the adapter. Next step is to get the network bindings. We accomplish this using the Get-NetAdapterBindings cmdlet and pass the -Name variable.
Get-NetAdapterBindings -Name Wi-Fi
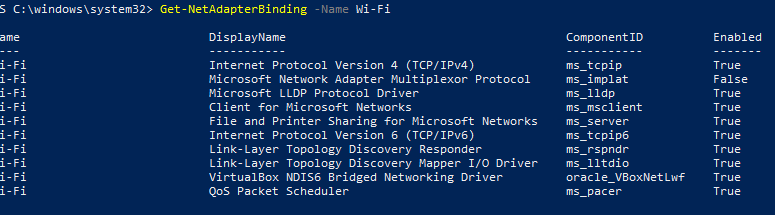
As you can see the component ID of IPv6 is ms_tcpip6. So use the Disable-NetAdapterBinding cmdlet as follows.
Disable-NetAdapterBinding –InterfaceAlias “Wi-Fi” –ComponentID ms_tcpip6
![]()
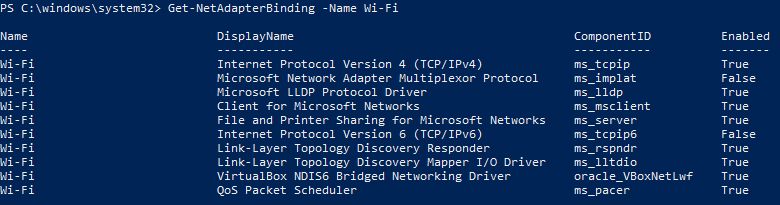
To verify we can run the Get-NetAdapterBindings cmdlet and see ms_tcpip6 is showing false.
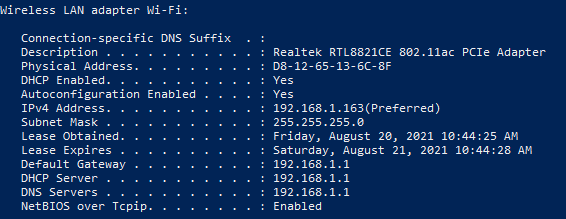
Reboot the system and verify no IPV6 address by running the ipconfig /all command.


Leave a Reply