How To Install VBoxAdditions on Fedora 18
With the latest Fedora release now out it is time to get it installed as a VM in VirtualBox and get the VBoxAdditions installed. First make sure you have VirtualBox 4.2.6 installed and then install Fedora as a VM as you usually do. Once you have all the latest updates installed and a few added programs, you are ready to install the VBoxAdditions.
First you will need to install gcc kernel-devel kernel-headers dkms make bzip2
$ sudo yum -y install gcc kernel-devel kernel-headers dkms make bzip2
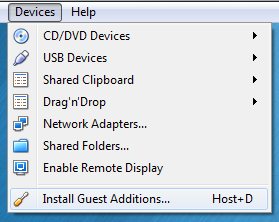
Now lets mount the VBoxAdditions, click Devices > Install Guest Additions.
VirtualBox will mount it to /run/media/<userid>/VBOXADDITIONS_4.2.6_82870. Open a terminal and change to the directory. Substitute <userid> with your login id.
$ cd /run/media/<userid>/VBOXADDITIONS_4.2.6_82870
$ sudo ./VBoxLinuxAdditions.run
Verifying archive integrity... All good.
Uncompressing VirtualBox 4.2.6 Guest Additions for Linux.........
VirtualBox Guest Additions installer
Removing installed version 4.2.6 of VirtualBox Guest Additions...
Removing existing VirtualBox DKMS kernel modules           [  OK  ]
Removing existing VirtualBox non-DKMS kernel modules       [  OK  ]
Building the VirtualBox Guest Additions kernel modules
Building the main Guest Additions module                   [  OK  ]
Building the shared folder support module                  [  OK  ]
Building the OpenGL support module                         [  OK  ]
Doing non-kernel setup of the Guest Additions              [  OK  ]
You should restart your guest to make sure the new modules are actually used

Installing the Window System drivers
Installing X.Org Server 1.11 modules                       [  OK  ]
Setting up the Window System to use the Guest Additions    [  OK  ]
You may need to restart the hal service and the Window System (or just restart
the guest system) to enable the Guest Additions.

Installing graphics libraries and desktop services component[  OK  ]
Now all that is left is to reboot.


Leave a Reply