


How To Secure OS X 10.11 Part 1

Introdution
This i the first of several posts on securing your OS X 10.11 “El Capitan” system. We will cover many different areas of which you can make your system more secure from spying eyes. It is your choice to use some of the techniques on your system. Some are for the mor hardcore or advanced users nd others are good for the normal at home users.
Full Disk Encryption
One of the easiest and first steps is to enable full disk encryption. OS X provide Filevault on your system and is eay to implement on your system.Filevault provides full disk (technically, full volume) encryption on OS X.
Filevault encryption will protect data at rest and prevent someone with physical access from stealing data or tampering with your Mac, the performance penalty for FileVault is not noticeable.
You can enable Filevault at the terminal by executing sudo fdesetup enable or using System Preferences > Security & Privacy > FileVault. Click on Turn On FileVault and reboot.
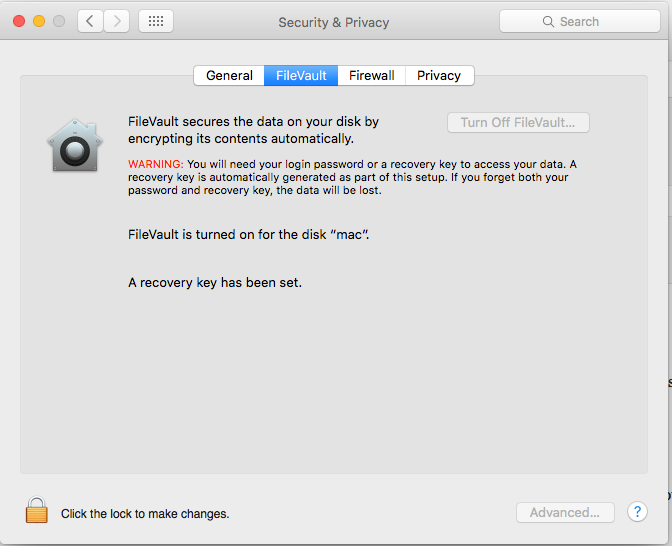
You will receive a recovery password. If you can remember your password, there’s no reason to save the recovery key. However, your encrypted data will be lost forever if you can’t remember the password or recovery key.
Be patient as it will take sometime to encrypt your drive.
Firmware password
Setting a firmware password in OS X prevents your Mac from starting up from any device other than your startup disk. It can also be helpful if your laptop is stolen, as the only way to reset the firmware password is through an Apple Store.
- Start up holding the
CommandandRkeys to boot from OS X Recovery mode. - When the Recovery window appears, choose Firmware Password Utility from the Utilities menu.
- In the Firmware Utility window that appears, select Turn On Firmware Password.
- Enter a new password, then enter the same password in the Verify field.
- Select Set Password.
- Select Quit Firmware Utility to close the Firmware Password Utility.
- Select the Apple menu and choose Restart or Shutdown.
The firmware password will activate at next boot. To validate the password, hold alt during boot – you should be prompted to enter the password.
Firewall
Before connecting to the Internet, it’s a good idea to first configure a firewall. There are several types of firewall for OS X.
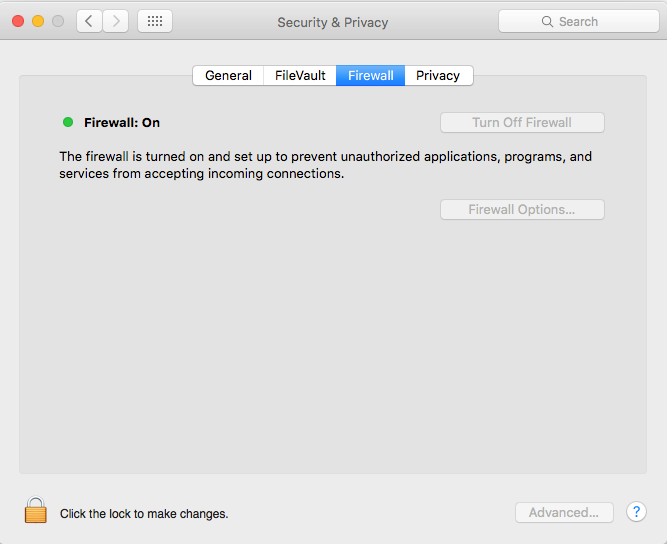
Application layer firewall
Built-in, basic firewall which blocks incoming connections only. Note, this firewall does not have the ability to monitor, nor block outgoing connections.
It can be controlled by the Firewall tab of Security & Privacy in System Preferences, or with the following commands.
Enable the firewall:
sudo defaults write /Library/Preferences/com.apple.alf globalstate -bool true
Enable logging:
sudo defaults write /Library/Preferences/com.apple.alf loggingenabled -bool true
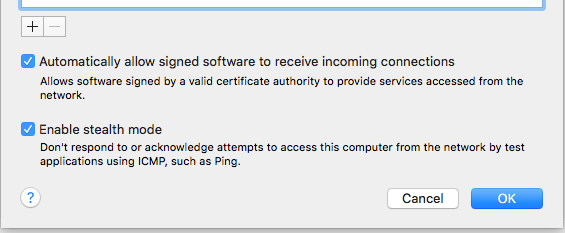
You may also wish to enable stealth mode:
sudo defaults write /Library/Preferences/com.apple.alf stealthenabled -bool true
Finally, you may wish to disable feature, Automatically allow signed software to receive incoming connections.
sudo defaults write /Library/Preferences/com.apple.alf allowsignedenabled -bool false
You can also set some of the settings in the GUI. Click on Click the lock to make changes and click on Firewall Options.
Click on the Privacy button and un-check Enable Location Services. You will receive a popup warning when you un-check location services. Then open Diagnostics & Usage and un-check Send Diagnostic and usage data to Apple.
Software Updates
Always keeping your system updated is a basic must for security. It ensures that you will always have the latest security and application updates from Apple. As of 10.8 all updates now appear in the Mac App Store. When updates are available you will see a notification center banner popup.
Account Settings
There are several user account settings located under System Preferences > Users & Groups.
Disable automatic login – Under Login Options change the Automatic login drop down to Off. Then change the Display login window as: Name and Password.
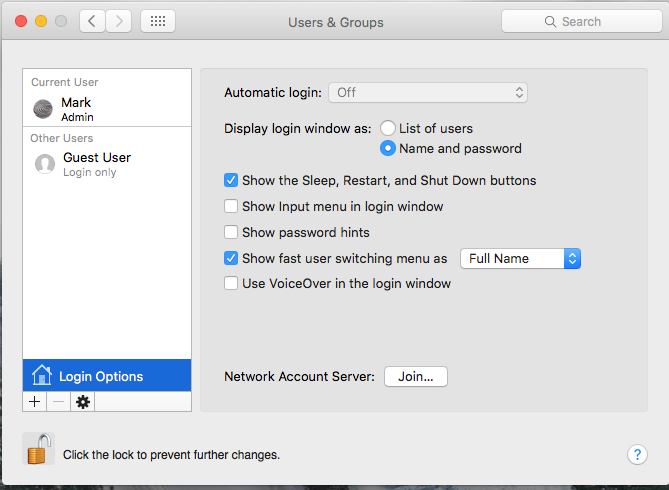
Disable password hints – uncheck Show password hints.
Conclusion
In this post we have covered a few of the basics to a more secure OS X system. Check back for future posts on securing more parts of OS X.


Leave a Reply